

Benchtop - Intermediate Challenge
Solder a workshop board!
Section titled “Solder a workshop board!”- Ask a PI at front desk for a soldering kit
- If the kit does NOT have all the components, grab the components listed on the PCB from Benchtop 8, as well as some solder (choose one of the smaller diameters). Ask a PI if you need help finding anything!
- Go to a benchtop and turn on the soldering iron:
- Make sure the power switch is flipped on (red is showing, screen turns on)
- Select an iron by pressing 1, 2, or 3. You want the one with a pointy tip.
- Press the left and right arrows simultaneously to turn on the iron. A blue ring should illuminate on the iron.
- Adjust the temperature to be around 350-375 F.
- Place in one component, bending the legs before soldering it. Ask a PI if you have never soldered before.
Note that some components have a specific orientation, namely ICs and transistors:
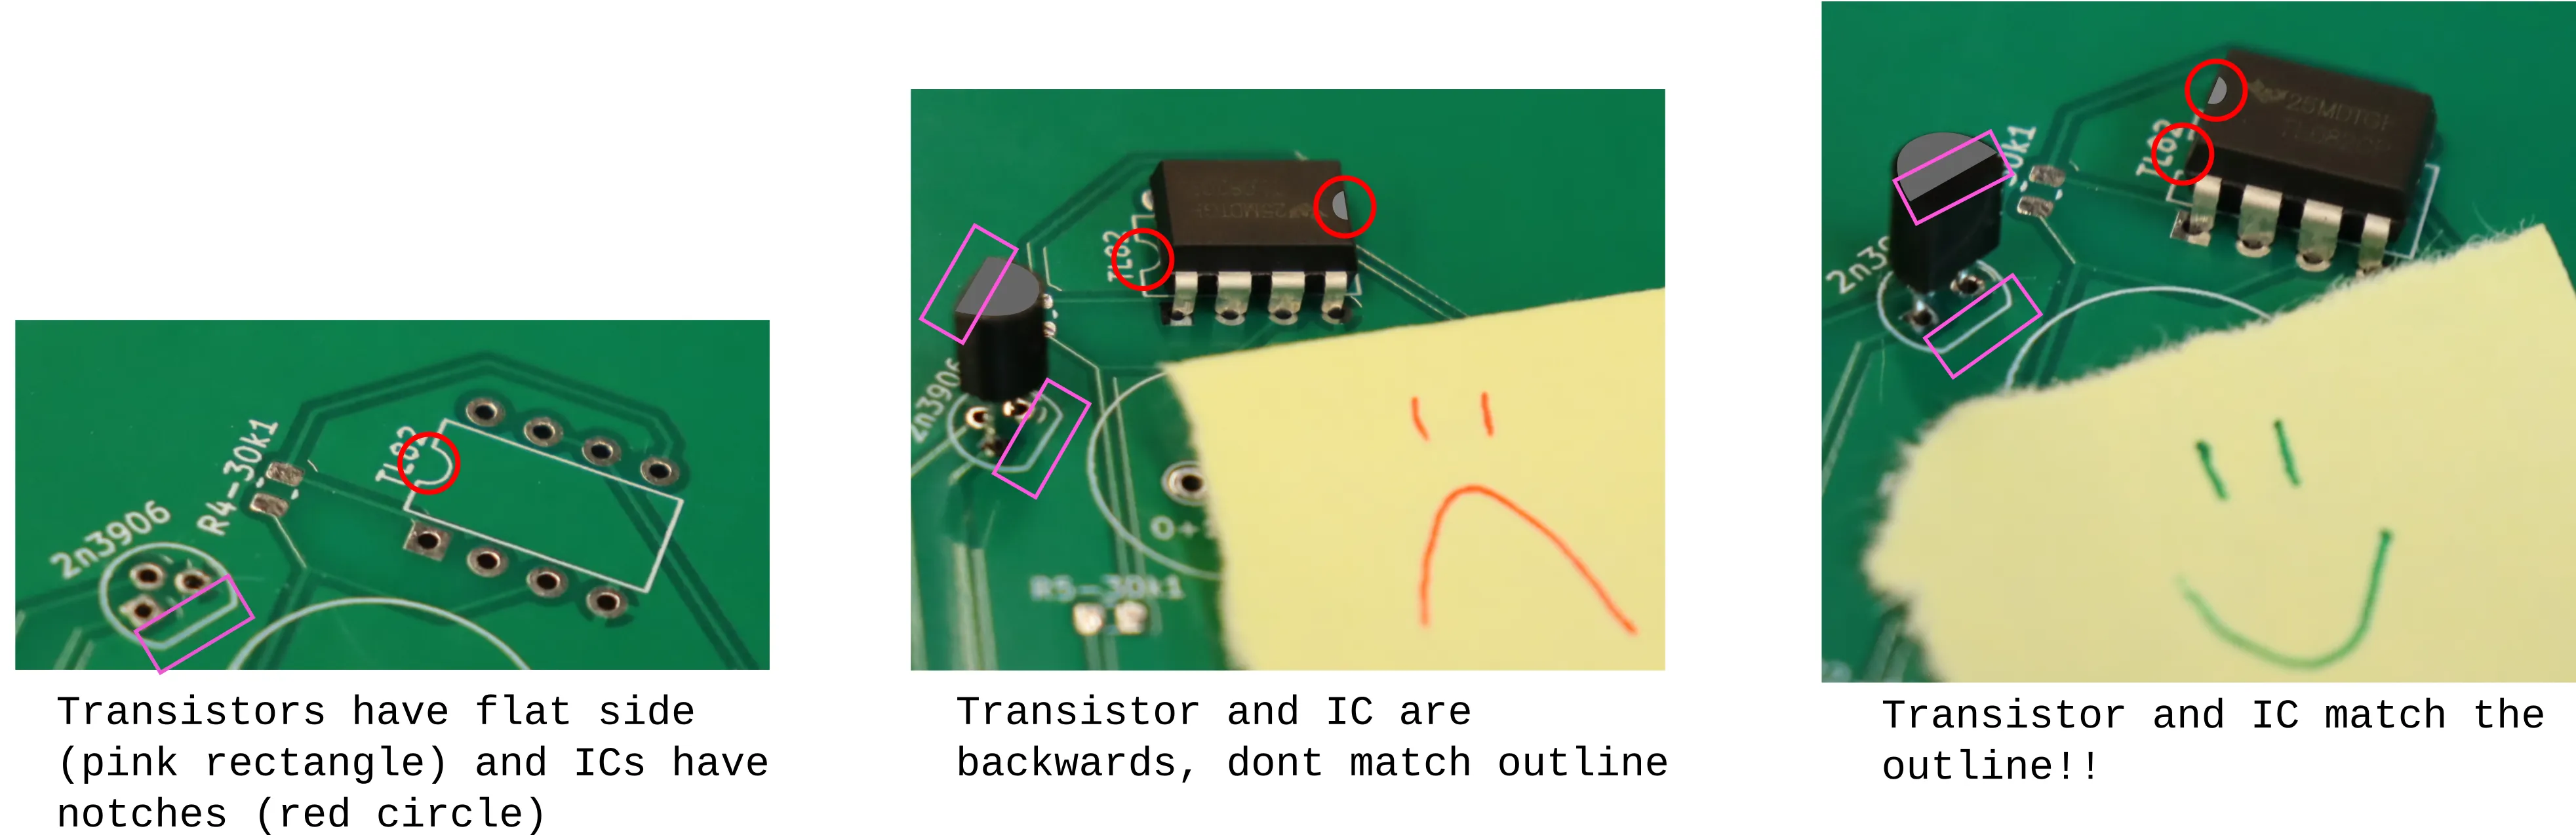
- Continue adding components. When you’ve added all the components, ask a PI to check your work and guide you through testing the board.
- Turn off the soldering iron.
- Show your soldering to a front desk PI to get a stamp!